AC Repair Woodbridge VA | Professional HVAC Repair Woodbridge Virginia

AC Repair Woodbridge VA | Professional HVAC Repair Woodbridge Virginia

The Process of HVAC Installation Explained by an Expert HVAC Contractor Woodbridge VA

Home air conditioner unit in summer season. Air conditioner unit outdoors in side yard of a brick home in hot summer season. No people. HVAC stock pictures, royalty-free photos & images

Installing an HVAC system is a critical process that ensures efficient heating, cooling, and ventilation in your home or commercial space. Below, we break down the installation process into six comprehensive steps to help you understand what is involved and how professionals ensure optimal performance.

Step 1: Evaluating the Space and Choosing the Right System

The first step in any HVAC installation is assessing the space where the system will be installed. This includes:
– Measuring square footage of the area to determine appropriate system capacity.
– Analyzing insulation levels and identifying areas prone to energy loss.
– Identifying specific heating and cooling needs based on regional climate conditions.

At this stage, HVAC professionals will recommend a system that balances energy efficiency with performance. Common options include central air systems, heat pumps, or ductless mini-split systems.

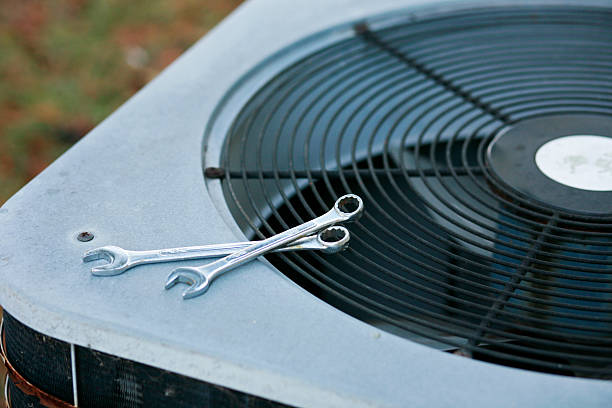
Step 2: Removing Old Equipment

If you’re upgrading or replacing an old HVAC unit, the next step involves safely removing existing equipment. This process typically includes:
– Disconnecting electrical connections and refrigerant lines (if applicable).
– Carefully removing old components such as furnaces, condensers, or evaporator coils.
– Properly disposing of outdated equipment following environmental guidelines.

Proper removal ensures there’s no damage to ducts, wiring, or other infrastructure.

Step 3: Preparing Ductwork and Infrastructure

Before installing new equipment, technicians inspect your ductwork for issues like leaks, blockages, or insufficient sizing. Any necessary repairs or cleaning are completed to maximize airflow efficiency. Some key checks include:
– Sealing leaks using mastic sealant or aluminum tape.
– Replacing damaged sections of ductwork as needed.
– Ensuring proper insulation around ducts located in unconditioned spaces like attics or basements.

For homes without ducts (e.g., when opting for a ductless mini-split), this step may involve planning alternative configurations for efficient distribution of climate control.

Step 4: Installing Equipment

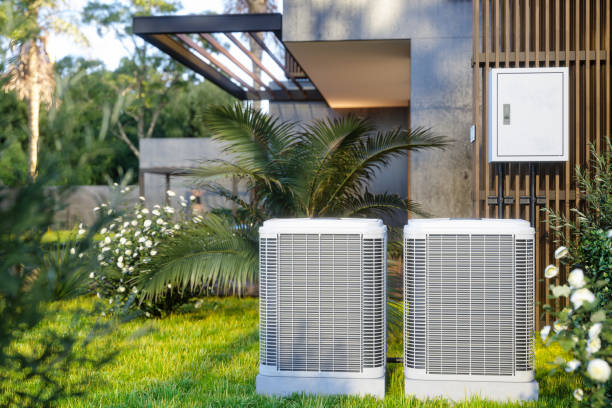
Once the foundation is ready, HVAC contractors install the selected system components. This may include:
1. Placing outdoor units like condensers on stable platforms. 2. Mounting indoor units such as furnaces or air handlers securely. 3. Connecting refrigerant lines between indoor and outdoor units. 4. Installing thermostats in accessible locations for easy control.

During installation, technicians follow manufacturer guidelines precisely to prevent future operational issues.

Component Installation Considerations
Furnace Ensure proper ventilation and clearance from combustible items
Air Conditioner Condenser Place on level ground with unobstructed airflow
Thermostat Install where it accurately reflects room temperature

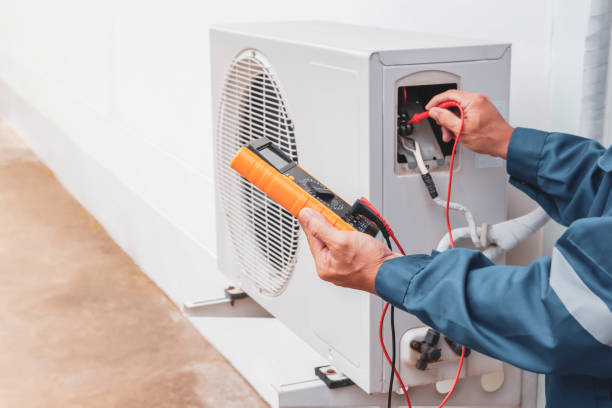
Step 5: Connecting Electrical Systems

Next comes wiring electrical components for safe operation: – Circuit breakers are inspected to ensure they meet voltage requirements. – Wiring connections between system components are completed using industry-standard practices. – Safety devices like surge protectors may be added to safeguard against power fluctuations.

A licensed electrician may also be involved during this phase if major electrical upgrades are required.

Step 6: System Testing and Calibration

After installation is complete, technicians thoroughly test all components to ensure proper functioning: 1. Checking refrigerant charge levels for cooling efficiency. 2. Verifying thermostat settings correspond correctly with desired temperatures. 3. Inspecting airflow pressure through registers and vents. 4. Testing electric connections for stability over extended periods of use.

Once tests confirm everything is working efficiently, technicians provide homeowners with guidance on operating their new system effectively while scheduling routine maintenance services for ongoing care.

Understanding these detailed steps helps property owners appreciate why professional expertise is essential during HVAC installations—ensuring maximum comfort while reducing long-term operational costs through attention to detail at every stage of the process.

Important Tips for AC Repair Woodbridge VA When Upgrading Your HVAC System

Replacing your HVAC system is a significant investment that requires careful planning and consideration. Making the right decisions during this process can not only save you money but also ensure the long-term comfort and efficiency of your home. Below is a comprehensive guide to some of the most critical factors to evaluate when replacing your HVAC system.

Assessing Your Current HVAC System

  • Is the system failing to maintain consistent temperature control?
  • Has energy consumption increased significantly in recent months or years?
  • Are repairs becoming more frequent and costly?
  • Does the unit make excessive noise or cause discomfort during operation?

Answering these questions will help determine if a replacement is necessary or if smaller repairs might extend its life.

Energy Efficiency Ratings

When selecting a new HVAC system, energy efficiency should be at the top of your list. Look for systems with high Seasonal Energy Efficiency Ratios (SEER) for cooling efficiency and high Heating Seasonal Performance Factors (HSPF) for heating efficiency.

Rating Type What It Measures Recommended Value
SEER Cooling efficiency 14 or higher (U.S. standard)
HSPF Heating efficiency 8.2 or higher
ENERGY STAR® Certified Overall energy savings that meet federal guidelines Yes

Investing in an energy-efficient unit may cost more upfront but can lead to significant savings on utility bills over time.

Proper Sizing of Your HVAC System

  • Square footage of your home
  • Number of windows and their orientation
  • Quality of insulation
  • Local climate conditions

Compatibility with Existing Ductwork

  • Leaks or gaps that could reduce air pressure
  • Insulation levels to minimize heat loss
  • Signs of damage or blockages restricting airflow

If necessary, consider repairing or replacing sections of ductwork alongside installing the new system.

Budgeting for Installation Costs

  1. Requesting quotes from multiple licensed contractors.
  2. Checking for rebates or tax credits available through state programs or utility companies.
  3. Considering financing options if upfront costs exceed your budget.

Advanced Features to Consider

  • Smart Thermostats: Allow remote control via smartphone apps.
  • Variable-Speed Motors: Provide smoother operation with lower energy consumption.
  • Zoning Systems: Enable customized temperature control in different areas of the home.

Evaluate which features align best with your needs and lifestyle before making a purchase decision.

By taking these essential considerations into account, you can select an HVAC replacement that offers optimal performance, reliability, and value over time.

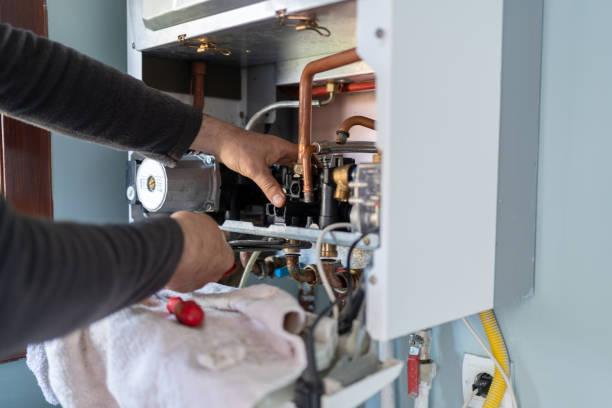
Key Factors to Keep in Mind for Furnace Repair Woodbridge VA

Replacing an HVAC system involves careful planning and decision-making to ensure your home’s comfort, energy efficiency, and long-term reliability. Before committing to a new HVAC system, several factors must be taken into account. Below are key considerations that can help guide you through the process.

1. Assessing Your Home’s Heating and Cooling Needs

The needs of every home are unique. Factors such as square footage, insulation quality, climate, and the number of occupants should influence your choice of a replacement HVAC system.

  • Square Footage: Larger homes typically require systems with higher capacity.
  • Climate: Homes in extreme climates may benefit from specialized systems designed for heating or cooling efficiency under specific conditions.
  • Home Features: Energy-efficient windows or high-grade insulation can reduce the demand on your HVAC system.

2. Choosing the Right Type of System

System Type Advantages Disadvantages
Central Air Conditioning Even cooling throughout the home Requires ductwork; higher installation cost
Ductless Mini-Split No ducts required; energy-efficient options Limited coverage per unit
Heat Pumps Efficient for mild climates; dual-use Less effective in extremely cold climates
Furnace + AC Combination Reliable for colder climates Higher initial costs

Discuss with a professional to determine which system best matches your home’s requirements.

3. Evaluating Energy Efficiency Options

  • SEER Rating (Seasonal Energy Efficiency Ratio): A higher SEER rating indicates better cooling efficiency.
  • AFUE Rating (Annual Fuel Utilization Efficiency): Applicable to furnaces; higher percentages mean better fuel usage.
  • ENERGY STAR Certification: Indicates compliance with government energy-efficiency guidelines.

4. Examining Installation Costs

  1. Initial Purchase Price – Ensure it aligns with your budget but avoid compromising quality for cost savings.
  2. Installation Fees – Professional installation ensures safety and optimal performance.
  3. Maintenance Costs – Some systems may require more frequent servicing than others.

5. Upgrading Ductwork if Necessary

  • Check for leaks or gaps that could cause air loss.
  • Confirm ducts are properly insulated.
  • Replace any outdated or damaged sections.

Ignoring ductwork issues can compromise performance even if you invest in a high-efficiency unit.

6. Partnering with a Trusted Professional

  • Verify credentials such as licensing and certifications (e.g., NATE-certified technicians).
  • Request detailed estimates that include labor costs, equipment prices, warranties, and timelines.
  • Read reviews or ask for referrals from trusted sources to gauge expertise and customer satisfaction.

A skilled professional will not only install your new system correctly but also provide guidance on maintaining peak performance over its lifespan.

Replacing an HVAC system is an investment that impacts both comfort and finances over time. By considering these factors carefully, you can make informed decisions tailored to your specific needs while optimizing performance and cost-efficiency in the long run.

An air conditioner being fixed Air conditioner in need of service or repair. HVAC stock pictures, royalty-free photos & images

Evaluating Your Existing Ductwork Before HVAC Installation Woodbridge VA

Before undertaking any HVAC repair project, it is essential to inspect and evaluate your existing ductwork. The duct system plays a critical role in ensuring the efficient operation of your heating, ventilation, and air conditioning system. Damaged, inefficient, or poorly maintained ductwork can lead to energy loss, reduced air quality, and uneven temperature distribution throughout your home or business. Below is a detailed guide to help you understand the process of inspecting and evaluating your ductwork before proceeding with repairs.

Why Ductwork Inspection Matters

  • Energy Efficiency: Leaking or poorly insulated ducts can account for significant energy loss, increasing your utility bills.
  • Indoor Air Quality: Dirty or damaged ducts may circulate dust, allergens, or mold throughout your space.
  • System Longevity: Faulty ductwork can strain your HVAC unit, leading to premature wear and tear.
  • Comfort Levels: Uneven airflow caused by damaged ducts results in hot or cold spots in different rooms.

Steps for Inspecting Ductwork

  1. Perform a Visual Inspection
    Start by visually examining accessible sections of the duct system:
  2. Look for disconnected joints or gaps.
  3. Check for visible cracks or breaks in the ducts.
  4. Identify areas where insulation appears worn or missing.
  5. Look for Signs of Damage
    Common signs that indicate an issue with ductwork include:
  6. Unusual noises (such as rattling) while the system operates.
  7. Evidence of pest infestations (droppings or nests near ducts).
  8. Noticeable buildup of dust near vents.
  9. Test Airflow at Vents
    Use an airflow meter (or simply observe airflow strength) at each vent in the building. Weak airflow could signal blockages, leaks, or design issues within the ducts.
  10. Check for Leaks
    Use one of these methods to identify leaks:
  11. Perform a smoke test: Release harmless smoke near joints and seams; watch for movement indicating escaping air.
  12. Seal off vents temporarily and pressurize the system to locate areas where air escapes.
  13. Assess Insulation
    Verify whether all duct sections located in unconditioned spaces (like attics, basements, or crawlspaces) are properly insulated. Poor insulation not only reduces efficiency but may also cause condensation buildup.
  14. Evaluate Duct Sizing & Design
    Improperly sized ducts can restrict airflow and reduce overall performance:
  15. Compare current duct sizing against industry standards recommended for your HVAC unit size.
  16. Assess if the layout promotes even airflow distribution.

Tools You May Need

Tool Name Purpose Availability
Flashlight To inspect dimly lit areas Hardware stores
Smoke pen/smoke stick Detects leaks in joint connections HVAC supply retailers
Airflow meter Measures airflow strength Online/HVAC suppliers
Metal foil tape Temporary sealing of small leaks Local hardware stores

When Should You Contact a Professional?

While minor inspections can be done on your own, certain scenarios warrant professional assistance: – If multiple leaks are detected that require complex repairs. – If you identify major structural damage such as collapsing sections of flexible ducts. – When extensive re-insulation is needed across large portions of the system. – If there are signs of mold growth inside the ducts.

Hiring licensed HVAC technicians ensures that repairs are done safely and meet industry standards—maximizing efficiency while maintaining clean air circulation within your space.

Proper evaluation of existing ductwork is a critical step that should not be overlooked when addressing HVAC repairs. By taking time to assess condition and functionality upfront, you set yourself up for better system performance post-repair while also minimizing future maintenance issues.

Tips for Identifying Issues with Cooling Lines and Refrigerant Systems During Emergency HVAC Service Woodbridge VA

Cooling lines and refrigerant systems are critical components of any HVAC unit, ensuring efficient temperature regulation in homes and commercial spaces. Issues with these systems can lead to reduced performance, higher energy bills, or complete system failure. Understanding how to identify problems early can save time and money while preventing unnecessary discomfort.

Common Signs of Cooling Line and Refrigerant System Issues

  1. If your HVAC system struggles to maintain a consistent temperature or takes longer than usual to cool your space, there may be an issue with the refrigerant levels or cooling line integrity.
  2. Low refrigerant levels often indicate a leak that needs immediate attention.
  3. Bubbling or hissing sounds near the cooling lines typically suggest a refrigerant leak.
  4. Grinding or rattling noises might point to damage within the system’s compressor, which works closely with the refrigerant.
  5. Ice buildup on the evaporator coils or cooling lines generally results from improper airflow, low refrigerant levels, or dirty filters. This issue reduces system efficiency and can lead to further damage if left unaddressed.
  6. A sudden spike in energy consumption without a corresponding increase in usage could signal that your cooling lines are working harder than necessary due to leaks or blockages.
  7. If your HVAC system frequently turns on and off without completing a full cycle, it may be experiencing issues caused by incorrect refrigerant pressure levels.

Steps for Identifying Cooling Line Problems

  1. Check for visible leaks around the copper tubing or fittings.
  2. Look for signs of corrosion, physical damage, or wear along the cooling lines.
  3. Monitor your HVAC unit during operation for any unusual sounds that could indicate mechanical failures related to refrigeration components.
  4. Using specialized gauges, measure the pressure within the system’s coolant lines against manufacturer-recommended levels.
  5. Place your hand near vents; reduced airflow could point toward blockages within ducts caused by ice formation or restricted coolant circulation.

Table: Common Causes vs Indicators

Problem Cause Possible Indicators
Refrigerant Leak Bubbling/hissing sounds; insufficient cooling
Damaged Cooling Lines Visible cracks/corrosion; fluid pooling
Compressor Malfunctions Grinding noises; short cycling
Dirty Filters/Blocked Lines Reduced airflow; ice formation

When Professional Help is Necessary

  • Persistent ice buildup despite regular maintenance.
  • Rapid loss of cool air after a recent repair.
  • Continuous hissing noises indicating major leaks in sealed components.

By addressing potential problems promptly, you can extend the life of your unit while ensuring comfort year-round through improved efficiency and performance from well-maintained cooling lines and refrigerants.

Recognizing the Signs That Indicate Your Heating or Cooling System Needs Immediate Repair

1. Unusual Noises Coming from the Unit

  • Banging or clanging: This might indicate loose or broken components inside the system.
  • Hissing: Could be a sign of refrigerant leaks or airflow issues.
  • Squealing: Often linked to problems with belts or motor bearings.
  • Buzzing: May suggest electrical issues.

If you notice any of these noises persistently, it’s crucial to have a professional inspect the unit.

2. Uneven Heating or Cooling

  • Blocked vents restricting airflow.
  • An issue with the thermostat’s calibration.
  • A failing compressor hindering performance.

Temperature inconsistencies can also stem from problems in ductwork. It’s vital to address this issue quickly to ensure comfort and prevent strain on your system.

3. Increased Energy Bills

Symptoms Possible Cause
Longer cycle durations Faulty thermostat
Decreased airflow Dirty filters
Frequent cycling (on/off bursts) Unsized system

Regular maintenance can avoid these inefficiencies and reduce operating costs over time.

4. Poor Airflow and Low Efficiency

  • A clogged air filter.
  • Problems with the blower motor.
  • Blockages within air ducts (e.g., debris buildup).

Restricted airflow not only reduces overall comfort but forces your HVAC system to work harder—leading to potential wear-and-tear over time.

5. Persistent Thermostat Issues

  • Failing to respond when adjusted.
  • Display errors (e.g., incorrect readings).
  • Inability to maintain consistent temperatures.

These problems often stem from wiring issues but should be inspected immediately before they affect entire system performance.

6. Strange Odors

  • Burning odors: Could signify electrical component overheating.
  • Moldy/musty scents: Likely caused by moisture buildup in ducts.

Address odor-related issues promptly since they may impact indoor air quality if left unchecked.

7. Excess Moisture Around Your Unit

  • Clogged condensate drain lines.
  • Refrigerant leaks (common with older systems).

Excess moisture not only reduces efficiency but could lead to structural damage and mold growth if untreated.

By recognizing these signs early and consulting a licensed technician for repairs, you can extend your system’s lifespan while maintaining reliable heating and cooling functionality throughout your home. Regular maintenance checks are instrumental in preventing minor problems from escalating into expensive breakdowns down the line.

The Role of Energy Efficiency in Choosing the Best Replacement HVAC System

When it comes to replacing your HVAC system, energy efficiency plays a pivotal role in selecting the best unit for your home or business. Not only does an energy-efficient system reduce environmental impact, but it also lowers utility costs over time. Below, we’ll explore how energy efficiency impacts performance and what factors you should consider when choosing a replacement system.

Why Energy Efficiency Matters

Energy-efficient HVAC systems are designed to optimize performance while consuming less power. This translates to:
Lower Utility Bills: Reduced electricity and fuel consumption means you save money each month.
Environmental Benefits: Fewer greenhouse gas emissions contribute to a greener planet.
Enhanced Comfort: These systems often provide more consistent heating and cooling.

Investing in an efficient unit is not just about cutting costs; it’s also about creating a sustainable living or working environment.

Key Metrics for Evaluating Energy Efficiency

Metric Description
SEER (Seasonal Energy Efficiency Ratio) Measures cooling efficiency over an entire cooling season. Higher SEER = Greater Efficiency.
AFUE (Annual Fuel Utilization Efficiency) Applicable to furnaces; indicates how well fuel is converted into heat. Higher AFUE = Less Wasted Fuel.
HSPF (Heating Seasonal Performance Factor) Used for heat pumps during heating mode. Higher HSPF = Better Heating Performance per Unit of Energy Consumed.
ENERGY STAR Certification Indicates the product meets or exceeds strict energy-efficiency guidelines set by the EPA and DOE.

Look for units with high ratings in these metrics to ensure optimal performance.

Factors Influencing Energy-Efficient Choices

  1. An oversized unit may waste energy by cycling on and off frequently.
  2. Undersized systems struggle to maintain comfort while operating inefficiently.
  3. Conduct thorough load calculations to determine the right capacity for your space.
  4. Your region’s climate plays a role in determining whether you need a heat pump, furnace, or air conditioner.
  5. Systems optimized for specific climates often perform better throughout their lifespan.
  6. Advanced Features
    Modern HVAC units come with features like programmable thermostats, zoning capabilities, and variable-speed motors, all of which enhance efficiency by tailoring operation to your actual needs.
  7. Leaky ducts can undermine even the most efficient system by allowing conditioned air to escape.
  8. Inspecting and sealing ductwork ensures maximum efficiency from your new unit.

Long-Term Savings vs Initial Costs

While energy-efficient systems often cost more upfront, they deliver long-term savings through reduced operating costs and fewer repairs due to advanced designs and technology integration. Consider using tools like ROI calculators offered by manufacturers to estimate how much you’ll save over time compared to less efficient options.

Replacing your HVAC system provides an opportunity not only to upgrade comfort but also improve overall energy usage with careful selection of high-efficiency models tailored specifically for your home or business needs.


Key Signs You Need AC Repair Woodbridge VA to Prevent a Complete Breakdown

Air conditioner technician repairing central air conditioning system with outdoor tools Air conditioner technician repairing central air conditioning system with outdoor tools HVAC stock pictures, royalty-free photos & images

Your HVAC system is crucial for maintaining a comfortable and healthy indoor environment. However, like any mechanical system, it requires occasional attention to ensure proper functioning. Recognizing early warning signs of trouble can help you avoid unexpected breakdowns and costly repairs. Below are some key indicators that your HVAC system may need repair.

Unusual Noises

One of the most noticeable signs of HVAC issues is unusual sounds coming from the system. These noises could include:
Grinding: Often a sign of faulty motor bearings.
Hissing: This could indicate refrigerant leaks or ductwork issues.
Banging or Clanging: Could be caused by loose or broken components in the blower assembly or motor housing.

When you notice these sounds, it’s essential to call a professional technician for an inspection.

Inconsistent Temperatures

If some rooms in your home feel warmer or cooler than others, your HVAC system may not be operating efficiently. Potential causes include:
– Blocked vents or ductwork.
– Malfunctioning thermostats.
– Issues with airflow distribution.

An uneven temperature balance often points to underlying problems that need addressing before they worsen.

Rising Energy Bills

A sudden spike in energy bills without any significant changes in usage patterns typically suggests your HVAC unit is working harder than necessary to maintain desired temperatures. Common reasons include:
– Dirty air filters restricting airflow.
– Aging components losing efficiency over time.
– Refrigerant levels being too low.

Monitoring monthly utility statements can help you detect inefficiencies early on.

Poor Air Quality and Humidity Control

Your HVAC unit also plays an essential role in circulating clean, conditioned air throughout your home while managing humidity levels. Signs indicating poor performance might include:
– Increased dust accumulation despite regular cleaning.
– Persistent moldy smells indicating moisture buildup inside the unit or ducts.
– Higher-than-usual indoor humidity levels causing discomfort during hot months.

Addressing such problems promptly can improve both comfort and health within your living space.

How Regular Maintenance Can Prevent Furnace Repair Woodbridge VA

Maintenance Task Frequency Notes
Change Air Filters Every 1–3 months Helps maintain airflow efficiency
Clean Evaporator/Condenser Coils Annually Prevents energy inefficiency
Check Refrigerant Levels Annually Avoids cooling performance issues
Inspect Electrical Components Annually Prevents wear/failure over time

Scheduling professional maintenance services at least once a year can also help identify potential issues before they escalate into major repairs.

Expert Tips for HVAC Installation Woodbridge VA: When to Call a Professional

  1. You detect refrigerant leaks (e.g., visible pooling liquid near components).
  2. The unit frequently cycles on and off without maintaining target temperatures (short cycling).
  3. Electrical controls seem faulty (e.g., tripped breakers when starting up).

Calling an experienced technician ensures safe diagnostics and appropriate solutions for complex problems that DIY troubleshooting might overlook.

Recognizing these warning signs early not only prevents unexpected malfunctions but also helps you save money by addressing smaller issues before they lead to more expensive repairs or full-system replacements.

Choosing an HVAC Contractor Woodbridge VA: When to Repair or Replace Your System for Peak Performance

Making the decision to repair or replace your HVAC system can significantly impact your home’s comfort, energy efficiency, and annual costs. Knowing when to take action is crucial to maintaining an optimally performing system. This guide outlines key considerations to help you decide what’s best for your situation.

When to Call for Emergency HVAC Service Woodbridge VA

  • Uneven cooling or heating: If certain rooms in your home are too hot or too cold, there may be an issue with airflow or ductwork that can often be fixed without replacing the entire unit.
  • Increase in energy bills: A sudden spike in energy costs could indicate inefficiency caused by minor issues like clogged filters or a malfunctioning thermostat.
  • Unusual noises: Rattling, hissing, or banging sounds from your system might suggest loose components or debris within the unit that a professional can address.
  • Poor air quality: Excessive dust or humidity inside your home may point to ventilation problems that don’t necessarily require replacement.

When Replacement May Be More Cost-Efficient

  1. Frequent repair needs: Spending money on repeated repairs for aging equipment adds up quickly and may exceed the cost of a new installation over time.
  2. Old age of the unit: Most HVAC systems last 10–15 years; if yours is nearing this range, upgrading ensures better performance and energy savings.
  3. Rising utility bills despite repairs: An older, inefficient system uses more energy even while seemingly functioning properly.
  4. Use of outdated refrigerants: Systems using phased-out refrigerants like R-22 should be replaced with modern units compliant with current environmental standards.

The Role of Regular Maintenance in Decision-Making

  • Replacing air filters every 1–3 months
  • Cleaning ducts annually to ensure proper airflow
  • Scheduling professional inspections twice a year (before summer and winter)

Repair vs Replacement Cost Comparison Table

Factor Repair Costs (Average) Replacement Costs (Average)
Minor Issues (e.g., filter replacement) $50–$150 N/A
Thermostat Replacement $100–$300 Included in new unit cost
Compressor Repair $500–$1,000 $2,500–$7,500
Full System Replacement N/A $5,000–$12,000

Note: Costs vary based on region and specific service providers.

Benefits of Upgrading Your System

  • Enhanced efficiency leading to lower monthly bills
  • Improved indoor air quality with advanced filtration systems
  • Quieter operation due to modern noise-reduction technology
  • Eligibility for rebates and tax credits when installing energy-efficient models

By weighing repair costs against the long-term benefits of replacing an outdated unit, you can determine which option aligns best with both your budget and performance expectations.

Close-up View Of Air Conditioning Outdoor Units In The Garden Of Villa Close-up View Of Air Conditioning Outdoor Units In The Garden Of Villa HVAC stock pictures, royalty-free photos & images

What Factors Affect HVAC Installation and Replacement Costs?

When it comes to installing or replacing an HVAC system, there are several factors that can significantly impact the overall cost. Understanding these variables will not only help you budget effectively but also allow you to make informed decisions about the system that best suits your needs. Below, we’ll break down the key factors that contribute to HVAC installation and replacement expenses.

1. Type of HVAC System

HVAC System Type Average Cost Range Key Features
Central Air Conditioning $3,000 – $7,000 Efficient cooling for entire homes
Heat Pumps $4,000 – $8,000 Provides both heating and cooling
Mini Split Systems $2,000 – $10,000 (varies) Zoned comfort without ductwork
Furnace System $2,500 – $6,500 Consistent heating for cold climates

The complexity of installation for certain systems (e.g., ductwork requirements for central systems) can also add to costs.

2. Unit Size

The size of your home directly impacts the size or capacity of your HVAC unit. Larger homes require more powerful units which tend to be more expensive. This is measured in BTUs (British Thermal Units) or tons for air conditioning capacity.

  • Smaller units (e.g., 1.5 – 2 tons) may cost less upfront but could lead to inefficiency in larger spaces.
  • Oversized units may cool or heat too quickly and result in uneven temperatures and increased energy bills.

A professional load calculation performed by an HVAC contractor ensures you purchase a unit that matches your home’s size and insulation levels.

3. Energy Efficiency Ratings

  • SEER Rating: For air conditioners and heat pumps, higher SEER ratings indicate better efficiency but come with a higher price tag.
  • AFUE Rating: For furnaces, AFUE ratings measure fuel efficiency—a high AFUE rating means better performance but potentially greater upfront expense.

Opting for energy-efficient units might cost more initially but will result in lower utility bills over time.

4. Ductwork Condition

  • Duct sealing or repair: ~$1,500 – $3,000
  • Full duct replacement: ~$5,000 – $10,000

Homes without ductwork may benefit from ductless systems like mini-splits as an alternative.

5. Labor Costs

  • Geographic location – Urban areas tend to have higher rates than rural locations.
  • Complexity – Installing new wiring or rerouting ducts increases labor time.
  • Permits – Some regions require permits for HVAC work which can raise total costs.

Additional Considerations

  • Brand Selection: Premium brands often come with better warranties but at higher prices.
  • Seasonality: Installing during off-seasons (spring/fall) may reduce contractor pricing due to lower demand.
  • Rebates & Tax Credits: Energy-efficient models may qualify for government incentives which can offset expenses.

Understanding these factors ensures you’re prepared when budgeting for an HVAC installation or replacement project while maximizing value over time.

How Much Does Unit Size and Efficiency Impact HVAC Costs?

The size and efficiency of your HVAC system play a critical role in determining both the initial installation costs and the long-term expenses associated with its operation. Choosing the right unit size and energy efficiency rating ensures not only optimal performance but also helps reduce energy bills over time. Below, we’ll explore how these factors influence HVAC costs and what you should consider when selecting a system.

The Importance of Proper Unit Sizing

  • May struggle to heat or cool your space adequately.
  • Experience excessive wear and tear from running constantly, leading to higher repair costs.
  • Result in higher energy bills due to inefficiency.
  • Frequently cycle on and off, causing uneven temperature distribution.
  • Lead to higher upfront costs since larger units are more expensive.
  • Increase humidity levels indoors, which can affect comfort.

To avoid these issues, it’s crucial to perform a load calculation based on your home’s square footage, insulation levels, number of windows, climate zone, and other factors.

How Efficiency Ratings Influence Costs

  1. The SEER rating measures cooling efficiency for air conditioning units.
  2. Higher SEER ratings mean better energy savings but can increase initial purchase costs.
  3. For example: | SEER Rating | Estimated Savings on Annual Cooling Costs | Initial Cost Difference | |————-|——————————————|————————–| | 14 | Standard Efficiency | Base | | 16 | ~10%-15% Lower Cooling Bills | Moderate Increase | | 20+ | ~20%-40% Lower Cooling Bills | Significant Increase |
  4. This applies to furnaces, measuring how efficiently they convert fuel into heat.
  5. Units with an AFUE of 90% or higher are considered highly efficient but come at a premium price.
  6. Used for heat pumps to measure heating efficiency.
  7. Higher HSPF values indicate lower operating costs during colder months.

Balancing Unit Size and Efficiency for Cost Savings

  • Opt for a unit size that matches your home’s heating or cooling needs as determined by professional load calculations.
  • Invest in systems with moderate-to-high efficiency ratings if you plan to stay in your home for several years; this ensures you recoup the extra cost through lower energy bills.
  • Consider incentives such as federal tax credits or utility rebates available for high-efficiency systems.

Additional Considerations

  • Maintenance Requirements: Larger or more complex high-efficiency units may require more frequent maintenance.
  • Lifespan: High-efficiency systems often last longer than standard models due to advanced technology.
  • Climate Zone: If you live in an area with extreme weather conditions, spending more on an efficient system may pay off faster in reduced operating expenses.

Selecting the correct combination of unit size and energy efficiency is not just about reducing upfront costs—it’s about maximizing comfort while minimizing long-term expenses. By working closely with an HVAC professional during the selection process, you can ensure that your investment delivers value both now and in the future.

Essential Tips to Save on HVAC Installation and Replacement Expenses

Replacing or installing an HVAC system can be a significant investment for homeowners and businesses alike. However, with thoughtful planning and strategic decisions, you can reduce expenses while maintaining efficiency and performance. Here are some essential tips to help you save on HVAC installation or replacement costs.

1. Compare Multiple Quotes

Before committing to an HVAC contractor, get multiple estimates from reputable professionals in your area. This allows you to:
– Evaluate pricing differences.
– Understand what each estimate includes (e.g., labor, materials, warranties).
– Avoid overpaying for installation services.

Look for contractors with good reviews and verified credentials to ensure high-quality work at a fair price.

2. Take Advantage of Seasonal Discounts

HVAC companies often provide discounts during slower seasons, such as spring or fall when demand is lower. Scheduling your installation or replacement during these periods could help you save significantly on labor costs and equipment pricing.

3. Research Energy-Efficient Models

Investing in an energy-efficient unit may have a higher upfront cost but can lead to long-term savings through reduced energy bills and possible tax incentives. Look for systems certified by ENERGY STAR® to ensure peak performance and efficiency.

4. Leverage Incentives and Rebates

Many states, local governments, utility companies, and manufacturers offer rebates or incentives for purchasing energy-efficient HVAC systems. Check the following:
– Federal tax credits related to energy efficiency improvements. – State-level rebate programs. – Utility provider offers for upgrading old units.

These initiatives can help offset the initial cost of your investment.

5. Consider the Right Sizing for Your Space

Installing an improperly sized system—whether too large or too small—can lead to inefficiencies, higher operating costs, and unnecessary repairs over time. Work with a professional contractor who conducts load calculations (Manual J) before recommending a specific unit size.

Size Mismatch Issue Impact
Oversized System Higher energy consumption
Undersized System Strain on components leading to wear

Proper sizing saves money upfront by avoiding needless upsizing costs while ensuring efficient long-term operation.

6. Bundle Services When Possible

If you’re installing multiple systems (e.g., HVAC along with ductwork upgrades), ask contractors about bundling discounts. Bundling services often reduces overall labor charges as technicians complete multiple tasks during one visit.

7. Maintain Your Current System Regularly

Preventive maintenance extends equipment lifespan while delaying the need for full replacement:
– Schedule annual tune-ups. – Replace air filters regularly. – Clean ducts periodically if applicable.

Proper maintenance lowers operating expenses over time by ensuring optimal performance from existing components.

With careful planning using these tips, you can make a budget-friendly decision without compromising quality or system longevity when it’s time to replace or install your HVAC unit.


Comprehensive AC Repair Woodbridge VA: Solutions for Common Furnace and Cooling Issues

Gas Heating Boiler Service At Home Technician Repairing Natural Gas Combi Boiler At Home Furnace stock pictures, royalty-free photos & images

A furnace is an essential component of any home, especially during the colder months. However, like any other mechanical system, furnaces can experience issues over time. Understanding common problems and their solutions can help homeowners address these issues efficiently and maintain a warm, comfortable living environment.

Common Furnace Problems and Their Solutions

  1. Potential Causes:
    • Thermostat settings are incorrect or malfunctioning.
    • Pilot light is out (for older models).
    • A tripped circuit breaker or blown fuse.
    • Verify that the thermostat is set to “Heat” mode and adjust the temperature settings.
    • Check and relight the pilot light if needed (following safety precautions).
    • Inspect your home’s electrical panel for tripped breakers or blown fuses.
  2. Potential Causes:
    • Dirty air filters restricting airflow.
    • Leaky ductwork causing heat loss.
    • Replace or clean air filters regularly (every 1-3 months depending on usage).
    • Seal leaks in ductwork with specialized tape or consult an HVAC professional.
  3. Potential Causes:
    • A clogged air filter causing overheating.
    • Incorrect thermostat calibration or placement near heat sources.
    • Replace dirty filters to improve airflow and prevent overheating.
    • Reposition your thermostat away from direct sunlight or appliances that emit heat.
  4. Potential Causes:
    • Loose internal components like belts or screws.
    • Worn-out bearings in the blower motor.
  5. Solutions:
    • Tighten loose components using basic tools if accessible.
    • Schedule professional maintenance for more complex repairs involving motors.

Tips for Preventing Furnace Problems

  • Schedule annual inspections by a licensed HVAC technician to identify potential issues early.
  • Replace air filters regularly to ensure optimal airflow and efficiency.
  • Keep vents unobstructed by furniture or debris to promote proper heat circulation throughout your home.
  • Clean around your furnace unit to reduce dust buildup that may impact performance.

Comparison Table: DIY vs Professional Repairs

Task DIY Repair Suitable? Professional Assistance Required?
Replacing Air Filters Yes No
Relighting Pilot Light Yes (if familiar with steps) Recommended if unsure
Fixing Blower Motor No Yes
Sealing Duct Leaks Limited Recommended for extensive leaks

When deciding between tackling a repair yourself versus hiring a professional, consider factors such as complexity, safety risks, and whether special tools are required.

When to Call an HVAC Professional

  • Persistent heating problems despite troubleshooting attempts.
  • Carbon monoxide alarms going off—a sign of dangerous gas leakage from your furnace.
  • The need for repairs on newer furnaces still under warranty (to avoid voiding coverage).

Addressing furnace problems promptly ensures not only comfort but also safety during winter months when reliable heating is essential.

Understanding Furnace Repair Woodbridge VA: Types of Heating Systems and Their Impact on Repairs

Heating systems are integral to maintaining comfort in residential and commercial spaces, especially during colder months. Understanding the types of heating systems available and their unique characteristics is key to diagnosing and addressing repair issues efficiently. Below, we explore the most common types of heating systems, their components, and how they influence repair strategies.

Types of Heating Systems

  1. Furnaces (Forced-Air Systems)
    Furnaces are among the most widely used heating systems in homes across North America. These systems use natural gas, propane, oil, or electricity to heat air, which is then distributed through ductwork.
  2. Common Components: Burner, heat exchanger, blower motor, thermostat.
    • Issues with the burner or pilot light can lead to insufficient heat.
    • Blower motor malfunctions may prevent proper air circulation.
    • Dirty air filters can reduce efficiency or strain components.
  3. Boilers (Radiant Heating Systems)
    Boilers heat water or steam that circulates through radiators or underfloor pipes to provide warmth. These are common in older homes and buildings.
  4. Common Components: Heat exchanger, circulating pump, expansion tank, pressure relief valve.
    • Leaks in pipes or radiators can cause significant performance issues.
    • The circulating pump could fail due to wear and tear over time.
    • Sediment build-up in the boiler tank may reduce efficiency.
  5. Heat Pumps
    Heat pumps operate by transferring heat between indoor and outdoor spaces using refrigerant technology. They can serve as both a heating and cooling solution.
  6. Common Components: Compressor, reversing valve, evaporator coil.
    • Refrigerant leaks can impact efficiency or render the system ineffective.
    • Compressor failures may require costly repairs or replacement.
    • Problems with defrost cycles in cold weather may disrupt heating performance.
  7. Ductless Mini-Split Systems
    These systems provide zoned heating without requiring ductwork. They consist of an outdoor compressor unit connected to indoor air-handling units.
  8. Common Components: Indoor unit (fan & coil), outdoor compressor/condenser unit.
    • Electrical component malfunctions can disrupt both heating and cooling capabilities.
    • Clogged filters or coils reduce airflow and system efficiency.
    • Refrigerant issues often require professional servicing due to environmental regulations.
  9. Electric Baseboard Heaters
    Electric baseboard heaters use electricity to warm elements inside metal housings; these elements then radiate heat into a room directly.
  10. Common Components: Heating element, thermostat controls.
    • Overheating caused by faulty thermostats may impact safety and efficiency.
    • Worn-out components like resistors might need replacement after extended use.
  11. Geothermal Heating Systems Geothermal systems extract heat from below Earth’s surface using underground pipes filled with fluid that transfers thermal energy indoors.
    • Repair Complexity high due specialized equpment needed esp

How System Type Impacts Repairs

  • Some systems like furnaces often require attention on mechanical parts compared too

Understanding HVAC Installation Woodbridge VA: Types of Heating Systems and Their Impact on Repairs

Heating systems are a crucial component of maintaining indoor comfort, especially during cold seasons. Understanding the different types of heating systems not only helps in selecting the right one for your property but also provides insight into how repairs and maintenance may vary based on their design and mechanism. Below is an overview of the most common types of heating systems, their unique features, and how they influence repairs.

Types of Heating Systems

  1. How They Work: Furnaces heat air and distribute it through ducts using a blower. They rely on natural gas, propane, oil, or electricity as fuel sources.
    • Common issues include dirty filters, pilot light problems, or blower motor failures.
    • Repairs often require attention to ductwork leaks or malfunctioning thermostats.
  2. How They Work: Boilers heat water, producing either steam or hot water that circulates through radiators or radiant floor systems.
    • Leaking pipes or valves are frequent issues.
    • Problems with circulating pumps or expansion tanks may also arise.
    • Maintenance tends to be more specialized due to pressurized heating mechanisms.
  3. How They Work: Heat pumps transfer heat between indoors and outdoors using refrigerant technology. They can function as both heaters and air conditioners.
    • Refrigerant leaks are a common concern requiring professional handling.
    • Issues with outdoor units freezing up during winter can occur.
    • Electrical malfunctions in compressor components often demand skilled technicians.
  4. How They Work: These portable devices convert electrical energy directly into heat for small spaces.
    • Limited repair options; usually replaced if faulty due to affordability and simplicity.
    • Overheating issues might require checking internal wiring.
  5. How They Work: Utilizes electrical elements or hot water tubes installed under flooring to provide warmth directly from the ground up.
    • Damage to underfloor components can lead to costly repairs as floors may need removal for access.
    • Leak detection in hydronic systems (water-based) requires specialized tools.
  6. How They Work: These systems use underground loops filled with fluid to harness earth’s thermal energy for heating and cooling purposes.
  7. Repair Considerations:
    • Pipe leaks or damage can be challenging due to their underground placement.
    • Regular checks on fluid levels and circulation pumps help prevent major failures.

How Heating System Types Influence Repair Costs

Heating System Type Common Issues Average Repair Cost ($)
Furnace Filter replacement, pilot light 100–400
Boiler Leaks, circulation pump issues 150–600
Heat Pump Refrigerant leaks, frozen coils 200–700
Electric Space Heater Wiring problems <100
Radiant Floor Heating Pipe damage under flooring 500–2,000
Geothermal Heat Pump Underground pipe issues 1,000–3,000

Factors That Impact Repairs Across All Systems

  • Age of Equipment: Older systems tend to require more frequent repairs and may have parts that are harder to source.
  • Maintenance History: Regular maintenance reduces wear-and-tear-related malfunctions.
  • Complexity: Advanced technologies like geothermal heat pumps demand higher expertise compared to simpler options like electric heaters.
  • Environmental Conditions: Extreme weather conditions can strain certain types of heating equipment, increasing repair needs over time.

Understanding these various heating system types helps homeowners anticipate potential issues while planning for regular maintenance or repairs effectively. Proper selection based on your property’s needs can significantly reduce long-term repair costs while improving efficiency.

What to Do When You Need Emergency HVAC Service Woodbridge VA for a Broken Heater

A malfunctioning heater can be a major inconvenience, especially during colder months. If your heating system stops working, it’s essential to identify the root cause and determine the most effective solution. Below, we outline common reasons why heaters fail and actionable steps to resolve the issues.

Common Reasons Your Heater Stops Working

  1. Incorrect temperature settings or dead batteries in programmable thermostats.
  2. Malfunctioning thermostat sensors causing communication errors with the heater.
  3. Dust and debris accumulation restricting airflow.
  4. Reduced efficiency leading to overheating or inadequate heating performance.
  5. Faulty thermocouples or gas supply issues.
  6. Dirty ignition components preventing burners from lighting properly.
  7. Worn-out belts or motors causing poor airflow.
  8. Electrical failures leading to complete motor shutoff.
  9. Overloaded electrical circuits disrupting power to your heater.
  10. Safety mechanisms shutting off power due to underlying issues.
  11. Dirt buildup reducing heat transfer efficiency.
  12. Potential for cracks that compromise safety (carbon monoxide leaks).
  13. Obstructions in ducts affecting airflow distribution.
  14. Leaks in ductwork reducing overall system efficiency.

Steps to Fix a Non-Working Heater

  1. Ensure the thermostat is set to “heat” mode and its temperature is above room level.
  2. Replace batteries if needed, and check for loose wires.
  3. Locate air filters in your HVAC system and inspect them for dirt buildup.
  4. Replace filters if they appear clogged (recommended every 1–3 months).
  5. Check your home’s circuit breaker panel for tripped switches related to HVAC systems.
  6. Reset any tripped breakers but monitor if they trip again (this may indicate a deeper issue).
  7. Examine Pilot Light/Ignition System | Problem | Possible Solution | |———————|——————————————| | Pilot light is out | Relight using manufacturer instructions | | Dirty flame sensor | Clean flame sensor with sandpaper | | Gas supply issue | Ensure main gas valve is open |
  8. Inspect vents for visible obstructions like furniture, rugs, or debris.
  9. If ductwork leaks are suspected, consider professional inspection and sealing services.
  10. Test Blower Motor Functionality Signs of blower failure include weak airflow or unusual noises:
    • For belt-driven motors: Tighten loose belts or replace worn ones.
    • For other motor issues: Consult an HVAC technician for repairs/replacement.

When Professional Help Is Needed

  • Persistent problems after attempting DIY fixes (e.g., recurring circuit trips).
  • Noisy operation indicating internal component failures (e.g., squealing motors).
  • Unusual smells like burning odors, which could signal electrical hazards.
  • Visible signs of structural damage such as cracks in heat exchangers (critical safety concern).

Hiring an experienced HVAC technician ensures that complex issues are addressed correctly while maintaining system safety standards.

By identifying common causes and adhering to proper troubleshooting practices, you can restore functionality to your heating system efficiently while minimizing downtime during colder seasons.

Homeowner Installing New HVAC Air Filter Adult white homeowner installing a new air filter in an intake vent in a home ceiling. HVAC stock pictures, royalty-free photos & images

Key Factors to Consider When Hiring an HVAC Contractor Woodbridge VA for Heater Repair or Replacement

When faced with a faulty heater, deciding whether to repair or replace it can be challenging. Making the right decision requires evaluating several factors, including the age of your system, repair costs, energy efficiency, and frequency of breakdowns. Below is a guide to help you assess whether repairing or replacing your heater is the best option for your situation.

1. Age of the Heater

The age of your heating system plays a significant role in determining its future viability:
Lifespan by Heating Type:
| Heating System Type | Average Lifespan |
|—————————|—————————|
| Gas Furnace | 15–20 years |
| Electric Heat Pumps | 10–15 years |
| Radiant Heaters | Over 20 years (varies) |

  • If your system has reached or exceeded its expected lifespan, it may be more cost-effective to replace it.

2. Repair Costs vs. Replacement Costs

  • General Rule: If repair costs exceed 50% of the cost of a new unit, replacement might be the better choice.
  • Frequent minor repairs can add up over time; consider these cumulative costs when making a decision.

3. Energy Efficiency and Utility Bills

  • AFUE Rating: Check your furnace’s Annual Fuel Utilization Efficiency (AFUE) rating. Newer systems often have an AFUE rating of over 90%, while older units may fall below 70%.
  • Upgrading to an energy-efficient unit can significantly lower monthly utility costs.

Comparison Table: Old vs. New Systems (Efficiency and Costs)

Feature Older Units Newer Units
Energy Efficiency Low High
Monthly Operating Cost High Low
Environmental Impact Significant Reduced

4. Frequency and Severity of Repairs

  • Consider how often you’ve had professional service calls in the past year.
  • A single major breakdown requiring expensive repairs—like blower motor or heat exchanger replacement—may justify replacing the entire unit.

Signs It’s Time for Replacement

Here are some key signs that indicate replacing your heater might be more practical than repairing it:
– The unit struggles to maintain consistent temperatures throughout your home. – Unusual noises such as banging or rattling persist even after routine maintenance. – A noticeable decline in indoor air quality or humidity control. – Persistent odor issues originating from your heating unit.

When Repair is Still Viable

There are also scenarios where repairing makes sense: 1. The system is under ten years old and still within warranty coverage. 2. Repairs are relatively inexpensive and infrequent. 3. You recently invested in key components like thermostats or duct upgrades that complement continued use.

Making an informed choice between repair and replacement ensures you optimize both comfort and long-term savings while avoiding unnecessary expenses. Assess all factors carefully before proceeding with any decision related to your heating system’s upkeep or upgrade needs.

Recognizing Issues Early: Top Signs Your HVAC System Needs Immediate Attention

Identifying problems with your HVAC (Heating, Ventilation, and Air Conditioning) system early can save you time, money, and discomfort. While some issues may seem minor at first glance, they can quickly escalate into more significant problems if left unaddressed. Below are the key signs that your HVAC system needs immediate attention.

1. Unusual Noises

Your HVAC system should operate relatively quietly. If you notice unusual sounds such as:
Banging or clanking: These could indicate loose or broken components in the unit.
Squealing or screeching: This often points to a worn-out blower motor or fan belt.
Hissing: This might signal refrigerant leaks or an air duct issue.

Ignoring these noises could lead to a complete system breakdown.

2. Uneven Heating or Cooling

If some rooms in your home feel significantly warmer or cooler than others, the problem might be within your HVAC system. Common causes include:
– Blocked vents or ducts
– A malfunctioning thermostat
– Aging equipment struggling to perform efficiently

Regular maintenance can help identify these issues before they worsen.

3. Higher Energy Bills Without Increased Use

A sudden spike in energy costs without a corresponding change in usage often signals that your HVAC system is not operating efficiently. Possible reasons include:
– Clogged air filters reducing airflow
– Leaky ducts causing heat loss or cooled air to escape
– An aging unit working harder to maintain desired temperatures

Tip: Compare energy bills from the same season in previous years to identify irregularities.

4. Frequent Cycling On and Off

Short cycling, where your HVAC repeatedly turns on and off, may indicate:
1. A dirty filter restricting airflow
2. Problems with the thermostat’s placement (too close to heat sources)
3. An improperly sized unit for your home

Short cycling not only increases wear and tear but also reduces overall efficiency.

5. Persistent Odors Coming From Vents

Unpleasant smells emitted from your vents should never be ignored because they often signify deeper problems:
| Type of Odor | Potential Cause |
|———————–|——————————————————|
| Musty smell | Mold growth within ducts |
| Burning smell | Electrical issue such as wiring damage |
| Rotten egg smell | Gas leak (requires immediate professional attention) |

If any peculiar smells persist, it’s best to contact an HVAC technician immediately.

6. Poor Airflow

Weak airflow from vents reduces comfort and is often caused by one of the following: – Dirty air filters restricting air movement – Problems with the blower fan – Leaks in ductwork

Testing airflow using tools like an anemometer can help confirm whether professional repair is needed.

7. Excess Moisture Around Your Unit

If you notice water pooling near your HVAC unit, it may be due to: – A clogged condensate drain line blocking proper drainage – Refrigerant leaks reducing cooling performance

Excess moisture not only damages flooring and walls but also encourages mold growth around the area.

Preventative Measures for Early Issue Detection

To avoid costly breakdowns, consider these preventative steps: – Regular Maintenance Schedule: Hire professionals for biannual inspections. – Replace Filters: Change air filters every three months (or more frequently if needed). – Monitor Performance: Take note of changes in heating/cooling efficiency over time.

By addressing small issues early on, you can maximize the lifespan of your HVAC system while ensuring year-round comfort for your home or office environment.

Understanding How Each Heating System Works to Improve HVAC Repairs

To ensure efficient and effective HVAC repairs, it’s essential to understand how different heating systems function. Each type of heating system has unique components, configurations, and mechanisms that impact both performance and repair strategies. Below is a detailed breakdown of common heating systems, their operation, and how understanding these systems can lead to better maintenance and repair outcomes.

Forced-Air Heating Systems

Forced-air systems are one of the most common types of heating systems in residential and commercial properties. They heat air in a furnace and distribute it through ductwork using a blower motor.

How It Works:
1. A thermostat signals the furnace to ignite the burner or activate an electric heat element.
2. The furnace heats air, which is then pushed into ducts by a blower fan.
3. Warm air reaches vents in various rooms, ensuring even distribution of heat.

Key Repair Considerations:
Blower Issues: Malfunctioning fans or motors can disrupt airflow. – Heat Exchanger Cracks: This can cause inefficient heating or carbon monoxide leaks. – Thermostat Problems: Inaccurate temperature readings often require recalibration or replacement.

Radiant Heating Systems

Radiant heating transfers heat directly to floors or walls using hot water pipes or electric coils embedded in surfaces.

How It Works:
1. A boiler heats water (or electric elements generate heat).
2. Heat radiates through panels, floors, or walls into the living space without air movement.

Key Repair Considerations:
Piping Leaks: Water-based radiant systems often face challenges with pipe leaks that reduce efficiency.
Thermostatic Valves: These may malfunction over time and require servicing or replacement to maintain comfort levels. – Uneven Heating Zones: Air bubbles trapped in pipes can lead to cold spots that need professional attention.

Steam Heating Systems

Steam heating relies on boiling water in a boiler to create steam that travels through pipes to radiators installed in individual rooms.

How It Works:
1. A boiler heats water until it turns into steam. 2. Steam flows through pipes, heating radiators which then warm the surrounding space.

Key Repair Considerations:
Boiler Maintenance Issues: Sediment buildup inside boilers reduces efficiency and requires periodic cleaning. – Radiator Valve Problems: Radiator valves may wear out over time, leading to uneven heating. – Pipe Corrosion and Leaks: Old steam systems often encounter corrosion-related issues that need prompt repair.

Heat Pump Systems

Heat pumps are versatile systems that provide both heating and cooling by transferring heat rather than generating it directly like furnaces or boilers.

How It Works (Heating Mode):
1. The outdoor unit extracts warmth from outside air (even during cold conditions).
2. Heat is compressed via refrigerant cycles and transferred indoors for distribution through ductwork or mini-split units.

Key Repair Considerations:
Refrigerant Levels: Low refrigerant impacts performance significantly; recharging may be required. – Compressor Issues: Malfunctions here can disrupt both heating and cooling capabilities. – Reversing Valve Failures: Necessary for switching between modes; valve failures must be addressed immediately.

Comparison Table: Heating System Features

Feature Forced-Air Systems Radiant Systems Steam Systems Heat Pumps
Energy Efficiency Moderate High Moderate High
Maintenance Frequency Moderate Low High Moderate
Common Repairs Needed Blower motors Pipe leaks Boiler cleaning Refrigerant recharge
Initial Installation Cost Affordable High Moderate Moderate

Importance of Understanding System Differences

By recognizing how each system operates, HVAC technicians can diagnose problems more effectively while minimizing downtime for homeowners or businesses. This leads to faster solutions tailored to the specific needs of each type of system while optimizing overall energy efficiency and performance longevity for users’ comfort during colder months.

Understanding How Each Heating System Works to Improve HVAC Repairs

Having a clear understanding of how different heating systems function is essential for effective HVAC repairs. Different systems have unique components, mechanisms, and maintenance needs. By familiarizing yourself with these heating systems, you can not only troubleshoot problems more efficiently but also extend the lifespan of the equipment. Below is an overview of common heating systems and how their functionality impacts repairs.

Types of Heating Systems

  1. Functionality: Furnaces heat air using natural gas, electricity, or oil and distribute it through ductwork.
  2. Common Issues:
    • Dirty filters restricting airflow.
    • Ignition or pilot light failures in gas furnaces.
    • Malfunctioning thermostats causing uneven temperature distribution.
  3. Key Repair Tips:
    Regular filter replacement and ensuring proper thermostat settings can prevent major breakdowns.
  4. Functionality: Heat pumps transfer heat between indoor and outdoor environments using refrigerants.
  5. Common Issues:
    • Refrigerant leaks reducing efficiency.
    • Iced-over coils during winter operation.
    • Faulty reversing valves impacting heating/cooling modes.
  6. Key Repair Tips: Inspecting refrigerant levels and defrost systems can resolve many issues.
  7. Functionality: Boilers use water or steam to provide radiant heat through pipes and radiators.
  8. Common Issues:
    • Leaks in piping or connections.
    • Kettling (banging noise) due to mineral buildup in the boiler tank.
    • Circulator pump malfunctions reducing water flow.
  9. Key Repair Tips:
    Performing routine flushing of the system and checking for leaks can mitigate common problems.
  10. Functionality: These devices convert electricity into direct heat for small spaces without ductwork.
  11. Common Issues:
    • Broken heating elements diminishing performance.
    • Faulty safety switches or wiring causing shutdowns.
  12. Key Repair Tips: Always inspect internal wiring and replace damaged elements immediately.
  13. Functionality: Radiant heating supplies heat directly to floors, walls, or ceilings via electric cables or hydronic tubing beneath surfaces.
  14. Common Issues:
    • Leaks in hydronic tubing leading to inefficiency.
    • Damaged electrical wiring in electric-based radiant floors.
    • Uneven heating due to installation flaws.
  15. Maintenance Plan Routine layout re-inspections fixes technician consistently.